 |
||
| > Reader's Photo OX5 by Lockheed Martin |
||
| • ADVERTISE WITH US | ||
| • WHO IS MOAB JEEPER? | ||
Home > Jeep Articles > Technical & Installation - Engine / Drivetrain > Tom Wood's Custom Driveshafts |
||||||||||||||||||||||||||||||||||||||||||||||||||||||||||||||||||||||||||||||||||||
 |
||||||||||||||||||||||||||||||||||||||||||||||||||||||||||||||||||||||||||||||||||||
|
Tom Wood's Custom DriveshaftsArticle written by Moab ManDate Added: 06/07/2009 All of the MOABJEEPER Magazine vehicles exclusively run Tom Wood's drive shafts. We have a number of reasons for this: American made, Tom's support of the off-road industry, and the fact we know the quality put into every Tom Wood's "Woody" drive shafts. |

|
 We turn away many products for review that we simply would not purchase. For example, an expensive custom axle we simply couldn't ever recommend to our readership. Sure, everything in us screamed "I WANT IT!" The axle was insane, and it would have been right at home under a tank. But the simple fact is it was just too impractical to honestly pitch as a product our readers need. It's not too unmanly to cry is it? We turn away many products for review that we simply would not purchase. For example, an expensive custom axle we simply couldn't ever recommend to our readership. Sure, everything in us screamed "I WANT IT!" The axle was insane, and it would have been right at home under a tank. But the simple fact is it was just too impractical to honestly pitch as a product our readers need. It's not too unmanly to cry is it?Conversely, there are other products that are well worth your investment, such as putting a quality set of drive shafts under your vehicle. It can be a tough choice with all the various brands out there, so we decided to make the choice easy for you. We popped in on Tom Wood and asked him to show our readers what goes into every shaft that carries his name. |
||||||||
|
Installation | |||||||||

|
1. Parts! There are bins and bins of parts. Taking us through his warehouse, Tom showed us some of the many bins that arrive carrying the raw parts used to assemble a drive shaft for virtually any off-road application.
|
||||||||

|
2. Browsing through the many bins in the warehouse and the shop, we find flanges, CV joint parts, and other things we've never seen before.
|
||||||||
|
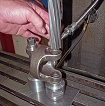
3. With this many parts on site, and the huge number of drive shafts rolling out of the shop, it would be easy for quality to slip. It doesn't, however, because the crew has pride in the product and quality check the bins and assembled shafts for fit and finish. They also have plenty of equipment on hand to clean things up if necessary.
|
||||||||
|
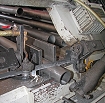
4. In addition to all the parts bins, Tom has plenty of steel tubing in stock.
And just so you know... Each drive shaft's tubing is cut in-house for your specific application.
|
||||||||

|
5. All CV joints are assembled in house and checked for proper function prior to use.
 Each CV joint contains Tom's own proprietary socket for the internal ball joint assembly. Each CV joint contains Tom's own proprietary socket for the internal ball joint assembly. |
||||||||

|
6. The u-joints are Tom's proprietary lifetime warranty joints.
 If you have met Tom, you know he has high expectations. He felt he could build a better mouse trap and sure enough, he came up with an improved u-joint; go figure. If you have met Tom, you know he has high expectations. He felt he could build a better mouse trap and sure enough, he came up with an improved u-joint; go figure.
|
||||||||
|
7. Now that we have seen all the parts, lets build a drive shaft!
|
|||||||||
|
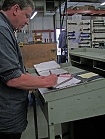
8. Follow along with us as we track the birth of a driveshaft from an order on the phone, to a shaft shipping out the door.
What you don't see? The books shown on the desktop in front of Tom contain information for just about every application of drive shaft. This massive collection of information allows Tom's team to accommodate customers with all kinds of crazy configurations. And since every shaft is custom built, they can fit just about any combination you come up with.
|
||||||||

|
9. With an order in hand, all the necessary parts are collected and "soft assembled". From here the drive shaft has to be trued.
|
||||||||

|
10. Starting with the CV, yoke, and shaft tubing, measurements are taken to ensure all things are squared.
|
||||||||

|
11. Same is done at the splined end of the main body of the shaft.
|
||||||||

|
12. Satisfied the splines and tubing are squared, they are welded "hard assembled" together.
|
||||||||

|
13. Moving down to the CV end, measurements are taken to assure there is a smooth rotation.
|
||||||||

|
14. This may come as a surprise, but a hammer can actually be a precision tool. We're not saying we have that skill, but Scott clearly did as we watched him masterfully work to get a flawless alignment.
|
||||||||

|
15. In addition to the precision work with the hammer, Scott is a master with the torch. Using the expansion and contraction of heated steel he works to align the entire assembly.
|
||||||||

|
16. Satisfied the shaft is true, the CV/yoke assembly is welded to the shaft tubing.
|
||||||||

|
17. Each shaft is repeatedly measured and adjusted until it is right. The process did not take that long, other than our repeated interruptions for pictures.
|
||||||||

|
18. Once the main body of the shaft is hard assembled, the short end of the shaft is slid onto the splines.
|
||||||||

|
19. The drive shaft is now prepped for balancing.
|
||||||||

|
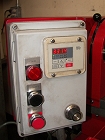
20. With the shaft securely mounted, the balancing begins.
|
||||||||
|
21. The speed is cranked up, and similar to a tire balancer, the machine provides feedback on where the shaft is out of balance.
|
||||||||

|
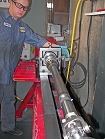
22. Weights are added where needed.
|
||||||||
|
23. Weights are taped in place and the shaft spun again to confirm the shaft is balanced.
|
||||||||
|
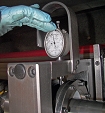
24. Imagine that... more measurements are taken.
|
||||||||

|
25. All weights are now welded in place.
|
||||||||
|
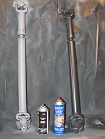
26. The construction of the shaft is now complete. At this point the shaft is handed off, cleaned, and painted.
|
||||||||

|
27. U-joints and slip joint are greased.
|
||||||||

|
28. Bearing caps are taped in place to prevent loss.
|
||||||||

|
29. Hardware (bolts) are inserted.
|
||||||||
|
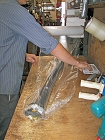
30. Everything is wrapped in plastic to both protect it and keep everything together.
|
||||||||
|
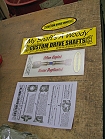
31. Info and stickers thrown in.
|
||||||||
|
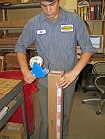
32. Finally, the finished product is boxed it up and shipped out.
|
||||||||
Final ThoughtsNow you may have heard the commercial about someone being so impressed with the product they bought the company. Along that same mindset, you will still find Tom after all these years still answering the phones and taking orders. |
|||||||||
Purchase / Vendor Info
|
| Vendor Name: | Tom Wood's Custom Drive Shafts |
| Address: | 2147 N. Rulon White Blvd. Building #1 Suite #103 Ogden, UT 84404 |
| Phone: | 1-877-497-4238 |
| Website: | http://www.4xshaft.com |
 Our
Thank You's!
Thank you Tom Wood and crew.
~MOABJEEPER Magazine Staff~
