 |
||
| > Reader's Photo OX5 by Lockheed Martin |
||
| • ADVERTISE WITH US | ||
| • WHO IS MOAB JEEPER? | ||
Home > Jeep Articles > Technical & Installation - Body Interior / Exterior > Bestop Instatrunk |
||||||||||||||||||||||||||||||||||||||||||||||||||||||||||||||
 |
||||||||||||||||||||||||||||||||||||||||||||||||||||||||||||||
|
Bestop InstatrunkArticle written by Moab ManDate Added: 12/21/2008 Owning a Jeep is a lifestyle. No other vehicle is so open and free as a Jeep. Unfortunately "free" is what the valuable pickings in your Jeep are without a Bestop Instatrunk. |

|
 When MOABJEEPER Magazine hits the trail, we load up with enough tools for anyone we come across. Any one of our tool bags can easily reach $500 or more. Throw in some camera equipment to record the insanity and various odds-n-ends, and every Jeep becomes a potential goldmine for those less honest. When MOABJEEPER Magazine hits the trail, we load up with enough tools for anyone we come across. Any one of our tool bags can easily reach $500 or more. Throw in some camera equipment to record the insanity and various odds-n-ends, and every Jeep becomes a potential goldmine for those less honest.In the past we answered the security concerns for some with our review of the Tuffy Oversize Security Drawer, but for those of us that need a back seat this box is simply too big. The Bestop Instatrunk offers security for your valuables while retaining the use of your backseat or while using the bed of your Jeep for carrying cargo (the limited amount you can actually fit on the floor of a Jeep that is). Follow along as we install and give our Final Thoughts on the Bestop Instrunk for Jeep Wrangler & Unlimited Wranglers 97-2006. Unlimited Wranglers are a little different - watch for the "Note." |
||||||
|
Installation | |||||||

|
1. Flip your rear seat forward. |
||||||

|
2. Install the weatherstripping from drivers side to passenger. Be gentle with the weatherstripping it can be easily damaged as we learned. Do not stretch the weatherstripping. Do not stretch the weatherstripping. |
||||||

|
3. Trim this little bit of overhang on the passenger side. Use a sharp razor for a clean cut without damaging the weatherstripping. |
||||||

|
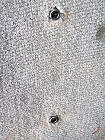
4. Lift up the carpet covering the wheel wells to expose the rubber grommets pictured. Unlimited Wranglers will need to use the Bestop Instatrunk as a template for drilling mounting holes. We suggest setting the Instatrunk in place, return the rear seat to its normal position, and close the tailgate to check fit. Satisfied with fit and placement, open the tailgate and use the Instatrunk as a template for where to drill. Unlimited Wranglers will need to use the Bestop Instatrunk as a template for drilling mounting holes. We suggest setting the Instatrunk in place, return the rear seat to its normal position, and close the tailgate to check fit. Satisfied with fit and placement, open the tailgate and use the Instatrunk as a template for where to drill.
|
||||||

|
5. Remove the grommets. Two on each side of the vehicle. |
||||||

|
6. Insert a Brass Wellnut into the holes previously plugged with the grommets. Steps 6-9 will be repeated three more times. Steps 6-9 will be repeated three more times. |
||||||

|
7. Slide the Flare Tool onto the included Screw Tool (only one of these included). The Flare Tool has a slight lip that should be facing the Brass Wellnut. Now screw the Screw Tool all the way into the Brass Wellnut. |
||||||

|
8. Once the Flare Tool is snug against the Wellnut you're ready to tighten. |
||||||

|
9. We suggest a wrench and socket. We were tempted to use the air tools to compress the Wellnut but decided it would be too easy to strip out the Wellnut. We were tempted to use the air tools to compress the Wellnut but decided it would be too easy to strip out the Wellnut. |
||||||

|
10. Here is our Wellnut compressed and seated. |
||||||

|
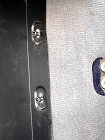
11. Insert the Small Bolts |
||||||

|
12. Lay the carpet back down over the wheel well. Feel for the heads of the Small Bolts through the carpet, and use a razor to carefully cut around the bolt heads. DO NOT try and drill through the carpet. DO NOT try and drill through the carpet. |
||||||

|
13. Place the Instatrunk in the back of the Jeep for a test fit. We started the Small Bolts to keep the Instatrunk in place while we made adjustments to get a proper fit. |
||||||
|
14. Check the fit of the weatherstrip seal against the tailgate. |
|||||||

|
15. Once satisfied with the fit and seal, bolt the Instatrunk in. |
||||||

|
16. The Instatrunk is water resistant and you could say soggy on the corners. Pictured is the small gap at the hinge side of your tailgate. You can stick your finger in there. |
||||||

|
17. The gap on the latch side of the tailgate. |
||||||

|
18. You still have complete access to the rear seat release. |
||||||

|
19. So how big is the storage capacity? |
||||||

|
20. Rather than giving you an inside dimension measurement, which really doesn't translate well, here is a picture of the Instatrunk stuffed.
|
||||||

|
21. What did we actually fit in there: Two tool bags (large: 20"x9"x9" & small 13"x8"x6"), small insulated lunch bag, 25' recovery strap, large tarp, jumper cables, two pairs gloves, and our own Trail Recovery Hook. |
||||||

|
Installation IssuesThe Small Bolts used to secure the Instatrunk in place could use some washers. The Allen heads are just not that large and could use the extra surface area afforded by washers to grip and hold the Instatrunk. |
||||||

|
Final ThoughtsOur expectations of Bestop products are pretty high, and once again Bestop has not disappointed. The fit is outstanding. Installation was straight forward and well thought out. We have not lost the use of our back seat, and we have gained enough protection for any valuables we need to secure (note to self... remember to lock the tailgate). And as a little bonus, the top of the Instatrunk makes a nice flat working area for making lunch or whatever else you might think of.While we do love the Instatrunk, not all is rosy. The weatherstripping can be easily damaged as we have shown in our picture. This damage happened when the tool bags brushed against the weatherstripping. This is not a reflection on Bestop but just a fact of compressible weatherstripping. The good news is that replacement weatherstripping can be purchased at your local Walmart relatively cheap, but the width (1 1/4") of the weatherstripping allows the seal to take quite a bit of damage before it would need replacing. |
||||||
Purchase / Vendor Info
|
| Vendor Name: | 4 Wheel Parts |
| Address: | 1789 S Redwood Rd Salt Lake City, UT 84104 |
| Phone: | 801-627-4420 |


