 |
||
| > Reader's Photo OX5 by Lockheed Martin |
||
| • ADVERTISE WITH US | ||
| • WHO IS MOAB JEEPER? | ||
Home > Jeep Articles > Technical & Installation - Engine / Drivetrain > OX Super 44 |
||||||||||||||||||||||||||||||||||||||||||||||||||||||||||||||||||||||||||||||||||||||||||||||||||||||||||||||||
 |
||||||||||||||||||||||||||||||||||||||||||||||||||||||||||||||||||||||||||||||||||||||||||||||||||||||||||||||||
|
OX Super 44Article written by Dr. JonesDate Added: 07/04/2007 Looking for a little more strength out of your Dana 44 without taking the jump to a Dana 60? Check out the Super 44 with OX Locker. |

|
 Since we are not trying to build a MONSTER rig and wanted axle strength we could abuse without care, we turned to the Super 44 with Ox Locker. This combination offers versatility of a selectable locker, the reliability of an OX Locker, and the strength of Superior?s 33 spline Dana 44 alloy axle shafts. Since we are not trying to build a MONSTER rig and wanted axle strength we could abuse without care, we turned to the Super 44 with Ox Locker. This combination offers versatility of a selectable locker, the reliability of an OX Locker, and the strength of Superior?s 33 spline Dana 44 alloy axle shafts.
With the install of our Super 44 OX Locker combo, it would only make sense to install proper gears. Now if you?ve read MOABJEEPER Magazine for any length of time, you?re aware that we prefer to turn all our own wrenches. BUT, there comes a time to recognize when a true professional is needed. To have our gears, Superior 33 spline shafts, and locker installed properly we turned to Ben Hanks Racing of Sandy Utah. As we go through the installation please keep in mind this is a job best left for a professional. Our installation is intended to show you only what is involved. |
||||||||||
|
Installation | |||||||||||

|
1. Put the vehicle on a lift and hoist it up till the axle is at an easy working height. Remove the tires. |
||||||||||

|
2. Remove the diff cover and drain the oil. |
||||||||||

|
3. Disconnect the rear driveshaft. |
||||||||||

|
4. Undo the bolts on the rear axle retainer. |
||||||||||

|
5. Pull the plate out of the way to allow the axle to slide out. |
||||||||||

|
6. Remove the axle shafts. This may take a little persuasion with a hammer or slide hammer. This may take a little persuasion with a hammer or slide hammer.
|
||||||||||

|
7. Remove the brake backing plate. This isn?t necessary for the installation, but it makes accessing the bearing race easier. This isn?t necessary for the installation, but it makes accessing the bearing race easier. |
||||||||||

|
8. Note the position of the carrier bearing caps. Ours were marked from the factory, but you may need to mark yours. The bearing caps must be put back in the same position they were in before or damage to the axle could result. The bearing caps must be put back in the same position they were in before or damage to the axle could result. |
||||||||||

|
9. Remove the bearing caps. |
||||||||||

|
10. Remove the carrier. |
||||||||||

|
11. Remove the pinion nut. |
||||||||||

|
12. Remove the pinion yoke. |
||||||||||

|
13. Slide the pinion out of the axle housing. |
||||||||||

|
14. Remove the pinion seal and pinion bearing. |
||||||||||

|
15. Punch out the outer pinion bearing race. |
||||||||||

|
16. Punch out the inner pinion bearing race, and remove the pinion depth shims. |
||||||||||

|
17. Thoroughly clean the inside of the axle housing. |
||||||||||

|
18. Axle housing ready for the new gears and locker |
||||||||||

|
19. To pre-assemble the locker, first remove the locking collar. |
||||||||||

|
20. Put the ring gear on the locker. |
||||||||||

|
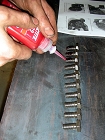
21. Use red Locktite on the ring gear bolts. |
||||||||||

|
22. Put the return springs in the locker housing. |
||||||||||

|
23. Place the shift collar back onto the locker. |
||||||||||

|
24. Bolt the end piece back on the locker again using red Locktite. |
||||||||||

|
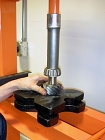
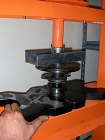
25. Press new carrier bearings onto the locker housing. The stock Dana 44 uses internal shims for backlash and carrier pre-load adjustment. The OX Super 44 uses external shims. The stock Dana 44 uses internal shims for backlash and carrier pre-load adjustment. The OX Super 44 uses external shims. |
||||||||||

|
26. Press a new internal pinion bearing onto the pinion gear. |
||||||||||

|
27. Install new pinion bearing races. Measure the pinion depth shims removed earlier, and use the same amount of new shims as a starting point. Measure the pinion depth shims removed earlier, and use the same amount of new shims as a starting point. |
||||||||||

|
28. Put the pinion gear into the axle housing. Measure the preload shims previously removed, and use the same thickness as a starting point with the new shims. |
||||||||||
|
29. Check pinion preload. Remove shims to tighten preload, add shims to loosen it. |
|||||||||||

|
30. Place the carrier shims outside the bearings and put the OX Locker in the axle housing. |
||||||||||

|
31. Using a dial indicator, check backlash. To decrease backlash, move shims from the passenger side to the driver side of the carrier. To increase backlash, do the opposite. |
||||||||||

|
32. When the preload and backlash are set, it?s time to check the gear mesh. Paint several teeth on the ring gear with gear paint. |
||||||||||
|
33. Applying resistance to the carrier, rotate the pinion until the entire painted section of the ring gear has meshed with the pinion gear. |
|||||||||||

|
34. Check the pattern for proper gear mesh. |
||||||||||

|
35. Change pinion depth to change the gear pattern. Remember that after changing the pinion depth, you will also need to adjust the pinion preload and recheck the backlash. |
||||||||||

|
36. When a good pattern is established, you?re done with the locker install. |
||||||||||

|
37. Press new bearings and seals onto the new Super 44 axle shafts. |
||||||||||

|
38. Put the brake backing plate back on, and install the shafts into the axle housing. |
||||||||||

|
39. Thread the shifter cable into the shift fork on the diff cover. |
||||||||||
|
40. Install the diff cover onto the axle housing and fill with gear oil. |
|||||||||||
|
41. Route the shifter cable away from the exhaust, and don?t make any sharp bends. |
|||||||||||

|
42. When running the cable through the body, wrap it in a piece of radiator hose or some other protective sleeve so it doesn?t get cut. |
||||||||||

|
43. Follow the supplied instructions for cable adjustment. Take your time and do exactly what the instructions say, and your locker will function flawlessly. |
||||||||||

|
44. Put the tires back on, and put the vehicle back on the ground.
Take care to properly break in the gears if you installed new ones. This means no freeway driving for 500 miles.
|
||||||||||

|
Installation IssuesWe had one issue with the installation, but it was an issue with our axle housing not the locker. Our axle had an oil slinger in the housing that got in the way of the shift fork. We had to grind it down about 1/8? in order to install the diff cover and shift fork. You can see in the picture how close the shift collar was to the tab in the axle. |
||||||||||

|
Final ThoughtsWe flogged the crap out of this setup in Moab during Easter Jeep Safari, and it didn?t miss a beat. The OX shifter smoothly and worked perfectly every time we needed it. Even with many many full-throttle assaults at some of the bigger obstacles in the area, the axle never showed a hint of weakness. We have total confidence in this setup. If an axle truss was added to the housing, this axle would be essentially indestructible with 33s and probably even 35s with a Jeep 4.0 and manual transmission.Check out the picture of the MOABJEEPER Magazine approved highly scientific quarter test. The size difference between the Super 44 and a stock Dana 44 axle shaft is quite noticeable. |
||||||||||
Purchase / Vendor Info
|
| Vendor Name: | OX Locker |
| Address: | 440 S. Pinellas Ave Tarpon Springs, FL 34689 |
| Phone: | 727-230-7803 |
| E-Mail Address: | |
| Website: | http://www.ox-usa.com |


