 |
||
| > Reader's Photo OX5 by Lockheed Martin |
||
| • ADVERTISE WITH US | ||
| • WHO IS MOAB JEEPER? | ||
Home > Jeep Articles > Technical & Installation - Body Interior / Exterior > Shrockworks P.O. Rockhammer |
||||||||||||||||||||||||||||||||||||||||||||||||||
 |
||||||||||||||||||||||||||||||||||||||||||||||||||
|
Shrockworks P.O. RockhammerArticle written by IckyDate Added: 08/26/2007 Shrockworks P.O. Rockhammer 6 month update. |

|
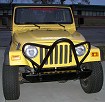
 6 month update: Many "stinger" style bumpers go untested until the moment of truth, when you need it the most. Unfortunately that is not the time to find out your bumper is more show than protection. We can without hesitation recommend this bumper as fully functional and able to handle anything you throw at it. How do we know this? Our Jeep Monkeyspank was involved in a head-on collision with the stinger taking the full impact. The fullsize pickup was demolished and the P.O. Rockhammer came away with scratched paint. From this "real world test" (not the way we wanted to test it) MJ is promoting this bumper to our MOABJEEPER Magazines Top Choice. 6 month update: Many "stinger" style bumpers go untested until the moment of truth, when you need it the most. Unfortunately that is not the time to find out your bumper is more show than protection. We can without hesitation recommend this bumper as fully functional and able to handle anything you throw at it. How do we know this? Our Jeep Monkeyspank was involved in a head-on collision with the stinger taking the full impact. The fullsize pickup was demolished and the P.O. Rockhammer came away with scratched paint. From this "real world test" (not the way we wanted to test it) MJ is promoting this bumper to our MOABJEEPER Magazines Top Choice."It's not if you'll roll, it?s when." If you?re the kind of Jeeper that doesn?t just stick to the kiddy rides, you should be planning for a roll and taking precautions. It?s no secret we have rolled five staff vehicles over the years (no readers rigs... yet). Knowing this, we decided to build our TJ "Monkey Spank" for what is most likely its destiny... a roll in Moab. To do this, our first step is the addition of the P.O. Rockhammer "stinger" type bumper from Shrockworks. Some of you may be asking what a "stinger" bumper is. It's one of those bumpers with the large hoop leaning forward off the bumper and rising up above the hood. This bumper design serves a couple of purposes. First, it helps to prevent a rear-over-front roll when coming down a steep angle. Second, in the event you do roll, it protects your radiator. There is no guarantee your radiator will be perfectly safe, but at least it has fighting chance. Follow along as we install this bumper, but first let me say something about the packaging. When the bumper arrived, it looked like some large fossil intended for the local university accidentally ended up at the doors of MOABJEEPER Magazine. It was odd shaped, wrapped in plastic, surrounded by cardboard, and partially filled with expandable foam. Shrockworks took great care to ensure their bumper arrives unscathed. On to the install. |
||||||||
|
Installation | |||||||||

|
1. As with any install, make sure you have all the listed parts. |
||||||||

|
2. Unbolt the four bolts from the top of your Jeep's bumper. |
||||||||

|
3. Unbolt the two from the underside. |
||||||||

|
4. Remove any additional items you may have mounted to the front of your Jeep: light bar, winch, steering box skid plate, etc... |
||||||||

|
5. This is what your Jeep will look like with everything removed. |
||||||||

|
6. Now remove the four bolts attaching the sway bar to the frame. |
||||||||

|
7. Carefully slide the bumper into place lifting the sway bar up and onto the rear of the bumper. |
||||||||

|
8. Because the front of the swaybar bracket is now on top of the bumper, a spacer is provided to slip under the rear of the bracket. |
||||||||

|
9. With the bumper in position and the swaybar spacers in place, reinstall the four bolts on the top of the bumper, the four bolts for the swaybar brackets, and the two bolts for the underside of the bumper. Loosely install all the bolts first. Once the bolts are started and the fit is right, tighten all of them down. We suggest using Loc-tite to keep the bumper secure. We suggest using Loc-tite to keep the bumper secure. |
||||||||

|
10. We did run into a slight alignment problem with the one of the swaybar brackets. |
||||||||

|
11. Using a grinder, we took off the corner of the bracket so it would clear the bumper's weld. With any grinding, use the proper safety gear. With any grinding, use the proper safety gear. |
||||||||

|
12. Here is how it looks from inside the Jeep. We left the plastic wrap on for the for the picture to make it easier to see. |
||||||||

|
13. Side view. |
||||||||

|
14. Frontal view. |
||||||||
Installation IssuesYou may or may not have the clearance issue with your swaybar bracket, but make sure you have a grinder handy just in case.The instructions from Shrockworks were very simplistic. For example, "Remove stock bumper..." is the extent of the instruction. They do not go into the detail that we have in this article. The instructions appear to be geared more toward buyers with some wrenching experience. |
|||||||||

|
Final ThoughtsEverything from Shrockworks seems to be a work of art, and this bumper is no exception. The welds are outstanding, and the functional stinger hoop is made from the same tough tubing as the Shrock Sliders (We have tested the tubing well and know it can take a beating).The D-ring mounts are one inch thick steel plate passed through the bumper and welded on both sides. These can handle way more load than your Jeep will be able to pull. You may have noticed that our parts picture has a large black plate that we did not install. This is a winch mounting plate that we will revisit soon with the install of a 9000lb Superwinch as part of the "Winches In Hell" winch shoot-out. |
||||||||
Purchase / Vendor Info
|
| Vendor Name: | ShrockWorks Offroad Fabrication |
| Address: | 14015 Barrington Fairway Houston, TX 77069 |
| Phone: | (877) 474-7625 |
| Website: | http://www.shrockworks.com |
 Our
Thank You's!
Note: The staff of MOABJEEPER Magazine would prefer not to roll Monkey Spank; however, we do believe that destiny can not be avoided.


