 |
||
| > Reader's Photo OX5 by Lockheed Martin |
||
 |
||
| • ADVERTISE WITH US | ||
| • WHO IS MOAB JEEPER? | ||
|

Home > Jeep Articles > Technical & Installation - Suspension > Big Daddy Offroad Tie-Rod & Install |
||||||||||||||||||||||||||||||||||||||||||||||||||||||||||||||||
 |
||||||||||||||||||||||||||||||||||||||||||||||||||||||||||||||||
|
Big Daddy Offroad Tie-Rod & InstallArticle written by Kizer of Links4Jeeps.comDate Added: 06/05/2006 After a lift and a front Stabilizer install I come to the conclusion my Tie-rod looks so wussy under the bumper its not even funny. |
Ok, its more than looking wussy its a matter of supporting an upgrade such as tires and a lift. Lets face it. When your banging around on a trail and you hit a rock. Do you want your front wheels to buckle or do you want to keep on moving? I want to keep on moving myself. I took a few things into consideration while laying down my credit card on this particular mod. First money being a decision and strength being the second. Yeah I must admit I picked price over strength, which is typically just my opposite. I normally look at the best then work my way back until I find something I can afford. I was considering a Tie-Rod upgrade and our buddy over at SwissMountain4x4.com introduced me to the idea of the Big Daddy Offroad tie-rod. First off the price sold me from the start. He then pointed me over to a review that RockCrawler.com did a while back. Oddly enough I've read that article, but wasn't in the market at the time. Now I am sold. |
|
|
Installation | |
|
1. Tools needed 13 mm socket 13 mm wrench Jackstand Floor Jack Large Crescent wrench Time 45-60 minutes |
|
|
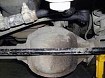
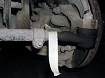
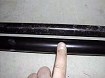
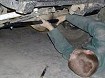
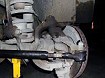
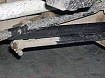
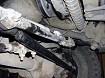
2. This is what the stocker looks like. How do people hit it so high up? Beats me, but they do. |
|
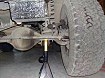
3. First off loosen them lugs on your drivers side wheel and place a jack stand under your axle supporting the wait. You do not
need to lift it up high. Just enough to get the wheel off the ground. |
|
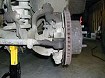
4. Now with your wheel off inspect your Tie-rod end to make sure the boot isn't torn in need of replacement. No since in messing
around with it if it needs replaced in the first place. |
|
5. As well with the passenger side. Inspect the boot for damage or wear. |
|
6. This step isn't required, but I did it anyway. Take a piece of tape and wrap your Tie-rod ends on the drivers as well as the
passenger side. I did it simply to insure when the Tie-rod is placed it takes up equal space on both ends. |
|
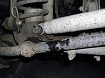
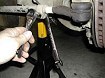
7. Use a 13mm socket and wrench to loosen the Drivers side. |
|
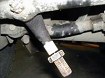
8. Underneath on the passenger side use the same 13mm socket and wrench to loosen. |
|
9. Now use your hand and twist the Tie-rod towards the back then towards the front to loosen any debris on the threads. Now
continue to twist towards you or clockwise looking from the passenger side. The Tie-rod will eventually loosen and fall off. |
|
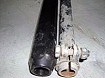
10. This is a side by side comparison of the Big Daddy and the stocker. I'll give you a hint. The stock rod is on the top. |
|
11. Same two rods. Dirty little guy is the stock rod. |
|
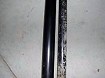
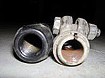
12. From the end they appear to be the same. Wrong. |
|
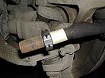
13. The stock rod uses a clamp and the Big Daddy uses a wrench end so you can tighten. As well the kit comes with a Jacking bolt
for both ends to insure the Big Daddy doesn't spin and loosen. |
|
14. Install the jacking nut with the cuts on it on the drivers side. Oddly enough it wouldn't go on the passenger side which lead me to believe it was a left cut thread. |
|
15. Install the other jacking nut on the passenger side. |
|
16. On the Big Daddy Tie rod there is a machined ring cut into the end. This end goes on the drivers side Tie-rod end. I figured this out by reading the included instructions as well I test fit on the passenger side and it wouldn't install. |
|
17. The instructions said to remove both Tie-rod ends and install on the Big Daddy. Being lazy I just inserted both ends of the
Tie-rod on the existing Tie-rod ends and slowly tightened until they both threaded on. Twist the Tie-rod towards the rear of
the Jeep or counter clockwise looking from the passenger side. |
|
18. Now notice in this picture the Jacking nut with the cut is on the same side with the machined ring in the Tie-rod. They are
both on the drivers side. |
|
19. Continue to twist the Tie-rod towards the rear of the Jeep or counter clockwise looking from the passenger side. |
|
20. Soon after what felt like a few minutes. My forearms burned a bit and I finally hit the end of the Jacking bolts. What's not
shown in this photo is the masking tape. I removed the masking tape just before. I used the masking tape to insure the
Tie-rod was in equal length on the drivers side as well as the passenger. |
|
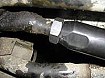
21. Now when you feel your Tie-rod is in the proper location tighten down both Jacking nuts against the Tie-rod. The great thing
about the Big Daddy Tie-rod is the Wrench ends so you can get a large wrench, crescent wrench or a pair of channel locks on them. |
|
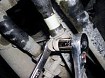
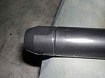
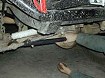
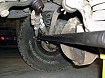
22. Another shot of the stocker just under the new Tie-rod |
|
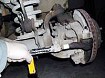
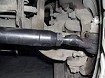
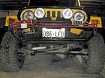
23. A few installed photos |
|
24. Come on hit me I dare you! |
|
25. Man that is just way to clean. |
|
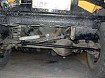
26. Passenger side looking towards Drivers. |
|
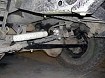
27. Drivers looking towards passenger |
Final ThoughtsLooks much better and the strength can't be beat. |
|
|
