|
|
|
Home > Jeep
Articles > Technical
& Installation - Engine / Drivetrain > Dana 44 Breather Fitting |
 |
Technical / Installation
Articles - Engine / Drivetrain
Dana 44 Breather Fitting
Article written by GreenYJ
Date Added: 05/12/2006
When swapping big, beefy axles under your rig, it?s easy to overlook some of the small details. The breather tube for instance. |
|
|
|
 Proper ventilation not only prevents unwanted pressure build-up, but also prevents dust, mud, and especially water from getting into your differential, which can damage your precious locker. á Proper ventilation not only prevents unwanted pressure build-up, but also prevents dust, mud, and especially water from getting into your differential, which can damage your precious locker. á
When I swapped my axles, I noticed the breather fitting was missing. I thought it would be easy to find and replace, but boy was I wrong! First I went to the local auto parts and hardware stores to find a suitable substitution. I found a few that fit the description but they did not thread into the hole in the diff. I ended up going to the dealer parts department. They printed the schematics of the 81? Grand Waggoner front axle and ordered my part. I went on my way thinking I had the problem solved till they called me back 2 days later telling me that the part was discontinued, and I should go to my local parts store to find something that would work.
|
| |

Installation |

|
1. What you need:
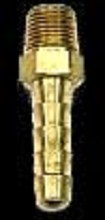
╝? x 1/8? I D HOSE BARB TO MIP ADAPTER (Home Depot #A-192B or PB225) Note, you may need a different size fitting depending on your specific application.
1/8? pipe tap (This was found in a quality standard tap and die set) Your tap size may vary depending you fitting size.
5/16? drill bit (With my axle I did not have to drill the hole any bigger.)
Tubing and hose clamps (You can use your existing hose if it will reach and is not damaged)
75w90 oil, rags, RTV, etc, to change the fluid because you have to pop off the differential cover.
|

|
2. First, the pretest.
I wanted to make sure that my tap and new breather fitting matched, so I grabbed a piece of scrap metal and tested the setup. Drill the hole with 5/16? drill bit. Start tapping the hole. Be patient - tapping takes time and should be done by someone who knows what they?re doing. After tapping the scrap metal, test the fitting. áIt should screw in effortlessly. áI highly recommend testing on scrap first. You don?t want to mess up that new axle.
|
|
|
3. Time for the real thing.
Stuff rags/paper towels into the differential so you don?t get metal shavings all over the place.
|
|
|
4. Drill out the hole in the differential to the appropriate size for the tap. When I went to drill the hole, I found to my surprise that the hole was almost the exact size I needed.
|

|
5. Slowly tap the hole in the differential, making sure to keep it straight.
|
|
|
6. After tapping the differential, make sure you blow out the hole with an air hose and pull out the rags/paper towels you previously put into the differential.
|

|
7. To make sure the fitting did not leak, I put a thin coat of RTV on it and tightened it slightly tighter than finger-tight.
|
|
|
 Final Thoughts
Finally, attach the hose, RTV the diff cover, slap it on, and fill the diff with gear oil, and you?re done! |
|
|
| |


